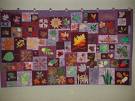
How To Make A Photo Quilt
Learning how to make a photo quilt will provide your family with precious memories to be passed down through the generations. Memories are the only treasure that only grows with the passage of time, it gets intense day by day and the richer it is, the more precious it gets. Family ties get stronger and people bond to each other with all the shared memories. What can be better than a photo quilt? This not only keeps the memories for generations but it also needs no story teller to narrate the memories. They speak for their selves.
Photo quilts are also well known as picture quilts, and for their purpose and making procedures they are called memory quilts. So don't you get confused between picture quilt, photo quilt and a memory quilt; they in fact are the same.
For me, out of all the quilt types, photo quilts hold the most significant place. I can not forget those five days in which I made the photo quilt for my grandmother. That was toughest for me, not because of the quilting pattern but because I was unable to withhold my tears while making that. Not to mention how much she cried when I gave it to her.
So if you get tears in your eyes while holding those small memorable fabric pieces, don't get upset. Try to preserve these memories in a perfect way, none other than a photo quilt. I've talked much about the emotional side now let's get back to the subject; how to make a photo quilt?
MATERIALS REQUIRED: (For more info refer Tools & Equipment for Beginner Quilting)
• Photos
• Photo scanner
• Fabric paper
• Printer
• Fabric of your color choice or any pieces from your old clothes.
• Threads
• Sewing machine.
• Needles and pins.
• Rotary cutter, ruler and cutting mat.
THE PROCEDURE - How to Make a Photo Quilt:
The most important thing in making a photo quilt is the design and the relevance to the memories. Right now I'm telling you how to make one with the scanned and printed photos, but you can even use any memorable fabric pieces or parts of clothing.
Before you begin constructing your photo quilt, you have to decide on a theme and a design. You can come up with any idea from marriage to children, from a dog bite story to the first bicycle. Anything!!! There is no boundary for imagination, right?
After you choose the theme, choose a corresponding color scheme. Choose and prepare your pictures. It is advisable to choose a high resolution photo without defects. They make special printable fabric or paper to make iron on transfers. You first need to scan the pictures in to your computer. You can even edit the picture before the printing.
Typically the squares should be from 6-12". When you've successfully edited each photo, print them out onto fabric sheets. Cut out each photo, cut and trim any excess fabric from the boundaries. Now make the pattern you want to make it in a quilt. Cut the other fabric pieces, can be plain or printed. Now arrange them on a design board. Make sure that all the fabric pieces are ironed and cut into proper shape. Now do piecing, batting, quilting and binding just like you do for any other block quilt. Now here's your perfect memory quilt. Give them to your loved ones and cherish the unforgettable memories.


